Artificial Turf Installation Process: Step1 – Grass, Weeds, Dirt Removal.
The first step in the artificial turf installation process is to excavate 2”-3” below hardscape removing grass weeds, dirt and any unwanted bushes or trees. A sod cutter is a common machine tool to help remove grass. Using flat shovels you can scoop up all the tear out into wheelbarrows and into a dumpster container or trailer and take it to a local landfill.
Step 2 – Base Preparation
The second step is to bring in the base to fill the 2””-3” back up which is the subsurface of the artificial turf. Most commonly used is class 2 road base. The class 2 road base is a recycled crushed and mixed rock aggregate that allows for drainage. Before the base is brought in you can spray the ground with a weed killer or drop a pre emergent weed control granule. During the process of bringing in the class 2 road base you must grade the area to your preferred liking. It’s recommended to grade the area away from your house, building or any structures. After the area is graded with a road base you must compact the surface using a vibrating plate compactor and hand tamper to reach areas the plate compactor can’t get to.
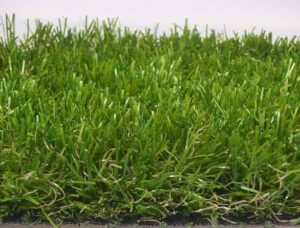
Step 3 – Artificial Turf Installation
The third step is laying the artificial turf. Artificial Turf comes in rolls 15ft wide by desired length. You must measure length and width of area and multiply the two to figure out the square footage. When laying artificial turf it is best to install the turf with the fiber blades direction facing the property or best view. You can also lay the turf in ways that will help eliminate excessive waste. It’s best to overlap hardscape or planter edging by 1-2” then stretch out the material using carpet kickers or stretchers using nails to anchor in place then cut around perimeter using a utility knife with a sharp razor blade. When area is wider than 15ft and you must seam 2 pieces of turf together the turf blades of each piece must face the same direction. Make sure to slide both pieces of turf together and keep Turf stitching gap consistent with factory stitching gap. After the stitching gap is aligned use a seaming tape fabric underneath the seam to prevent seam from separating or coming apart. After the turf material is stretched, seamed and cut you can nail the perimeter to secure with 5” nails 3”-4” apart and as close to the edge as possible. Drive the nails in until the head of the nail touches the backing and no further down as this will create divots and dents on surface.
Step 4 – Infill Application and Power Broom
The fourth and final step of the artificial turf installation process is to infill the turf and power broom. Recommend infill products you can use are silica sand, durafill (helps prevent bacteria growth) or zeofill (helps eliminate pet urine odors), You will have to check artificial turf product for amount of recommended infill but it’s common to infill at a rate of 1-2 pounds per square foot. To spread the infill you can use a landscape fertilizer spreader to ensure the infill is spread on turf evenly. After the infill product is spread evenly on artificial turf you use a power broom to brush fiber blades up and push infill to the bottom of the artificial turf. After the turf is infilled and brushed you can water the artificial grass to lock in the infill. You can now enjoy your artificial turf lawn.
You can Contact Us for getting Artificial Turf Installation process done by our experts.